>>
30-MINUTE MEALS! Get the email series now →


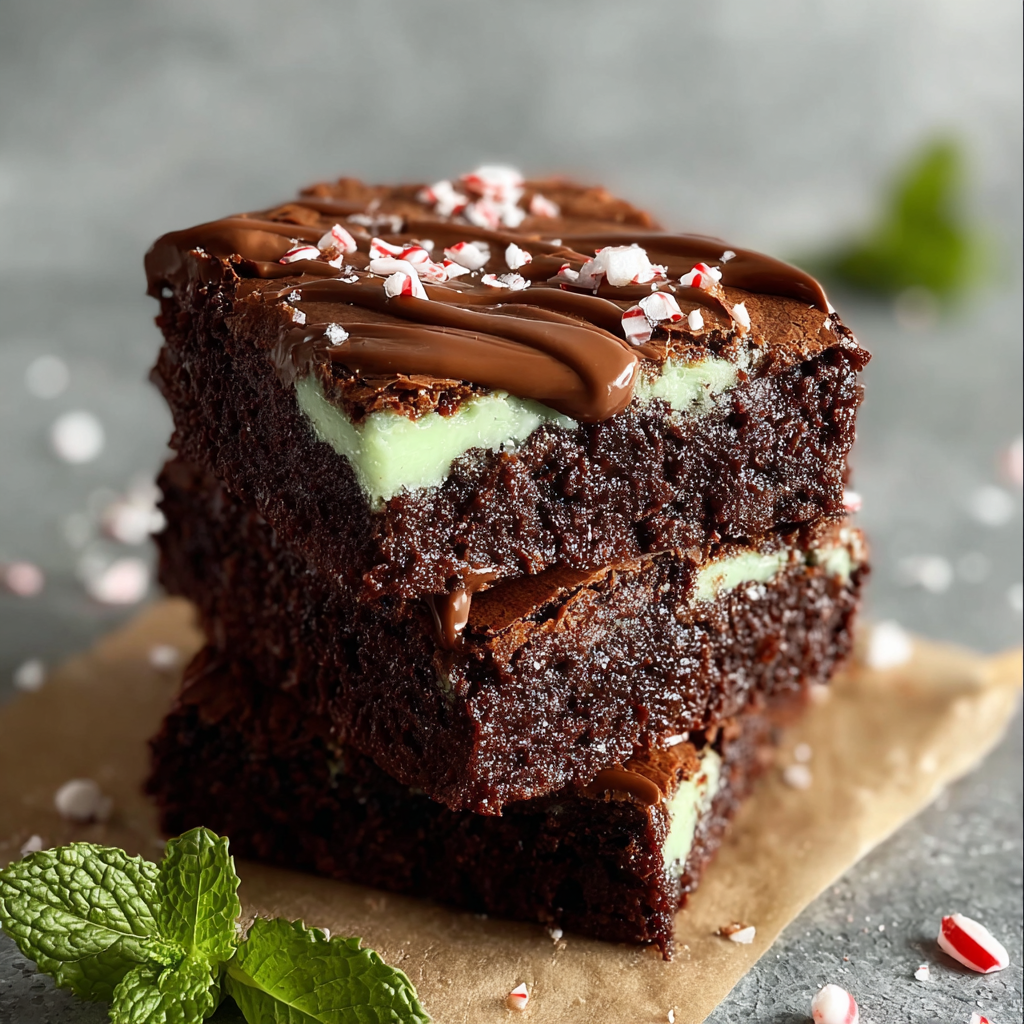
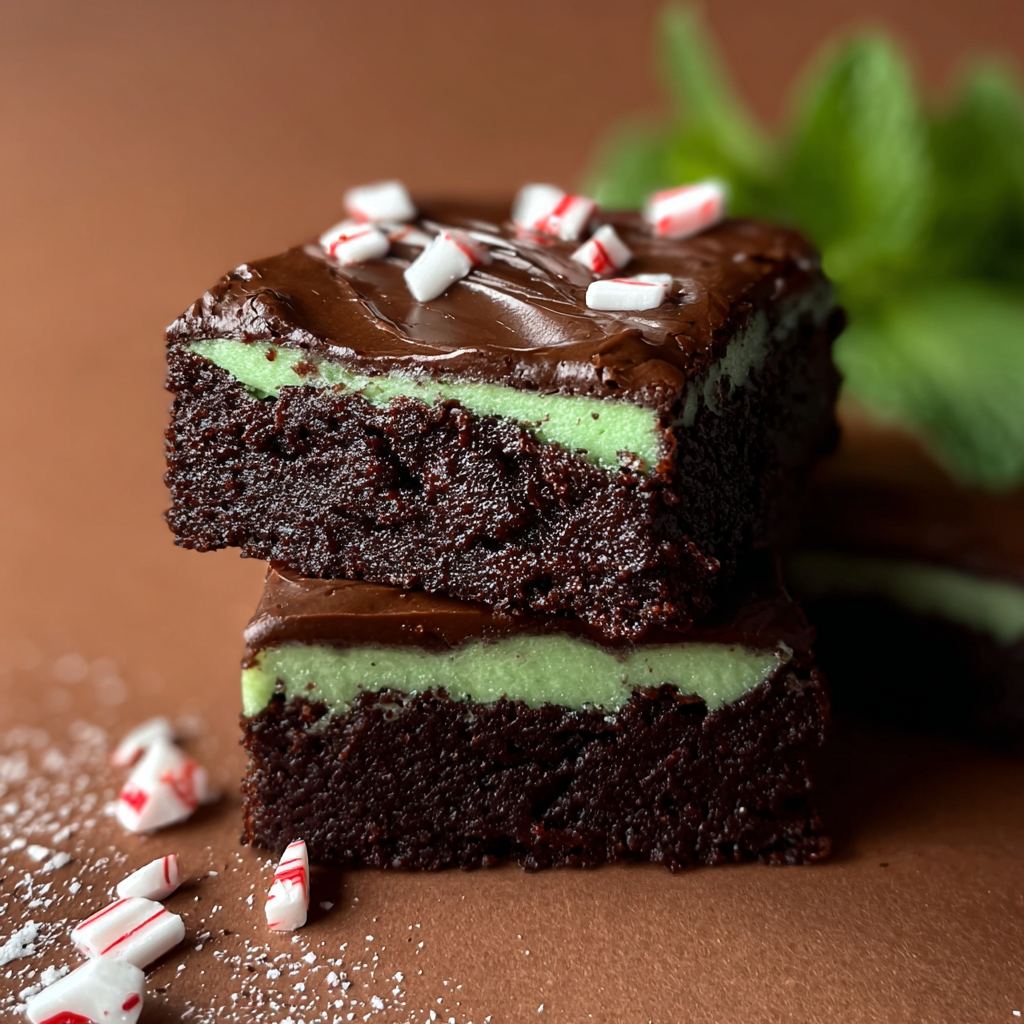
Fudgy chocolate squares with a bright peppermint lift—easy, quick, and perfect for holidays or weeknight chocolate cravings.

This batch of mint brownies began as a kitchen experiment the winter I wanted one treat that could do double duty: a cozy cookie-table staple and a quick, comforting pick-me-up after a long day. I discovered the combination while riffing on a classic fudgy brownie during a holiday cookie swap. The peppermint extract cuts through the chocolate in a way that feels both clean and indulgent—the cooling note plays beautifully against the dense, chocolatey base. Since then these have become my go-to whenever friends come over or when I want to bring something that looks homemade but comes together in under an hour.
The texture is what keeps everyone coming back: a slightly crackly top, a moist, nearly gooey interior, and big pockets of chocolate chips that melt into little molten gems. Using melted butter instead of oil creates an almost brownie-brownie hybrid—more tender than cake, less oily than some bars I’ve tried. The peppermint extract is concentrated, so a small amount does the work; for a gentler hint you can reduce it slightly. These brownies are simple, forgiving, and reliable—perfect for the novice baker and still satisfying for anyone who takes their chocolate seriously.
Family reaction sealed the deal—my sister declared them “dangerously moreish,” and a neighbor requested the recipe after trying one. I’ve brought these to cookie swaps, casual dinners, and the occasional work bake sale; they vanish fast and always earn compliments for being both familiar and a little unexpected because of the mint.
My favorite thing about this tray is how versatile it is—I've swapped extracts, pressed crushed peppermint candies on top for holiday flair, and used the same batter as a base for an ice cream sandwich experiment. Every time I bring these to a potluck someone asks for the recipe, which feels like a warm compliment. The balance of mint and chocolate somehow turns a simple brownie into a memorable dessert that sparks conversation.
Store cooled squares in a single layer in an airtight container. If stacking is necessary, place parchment between layers to prevent sticking. At room temperature the texture stays pleasingly soft for about 2–3 days; refrigeration extends this to a week but can firm the crumb—bring to room temperature or warm slightly before serving to restore the fudgy feel. For long-term storage freeze sliced squares in a single layer on a tray until solid, then transfer to a freezer-safe bag. Thaw overnight in the fridge or at room temperature for an hour before serving; a quick microwave burst brings back a just-baked quality.
If you need a dairy-free option swap the butter for a 1:1 plant-based butter or refined coconut oil (mild coconut flavor). Use egg replacer or two tablespoons of aquafaba per egg for an egg-free version—expect a slightly different crumb and less chew. For gluten-free use a 1:1 gluten-free flour blend that contains xanthan gum. Swap light brown sugar for dark brown for deeper molasses notes, or for a cleaner sweetness use granulated sugar but reduce slightly to maintain texture. If peppermint extract is too strong, replace half with 1/2 teaspoon pure vanilla extract for a subtler profile.
Serve squares warm with a scoop of vanilla ice cream and a drizzle of chocolate sauce for an indulgent dessert. For a holiday platter, garnish with finely crushed candy cane or a dusting of cocoa. Mini squares make excellent bite-sized party sweets—top each with a small dollop of whipped cream and a mint leaf for an elegant look. These also pair beautifully with espresso or a peppermint tea for a coordinated flavor experience.
Brownies are an American invention with roots in late 19th-century cookery, beloved for their simplicity and adaptability. The addition of peppermint is a modern twist likely popularized through candy-cane seasonality and chocolate-and-mint pairings common in European confections. The contrast of cooling mint against warm chocolate echoes classic pairings like peppermint bark and candy cane-topped desserts, blending nostalgic holiday flavors with an everyday, casual bar format.
In winter press crushed peppermint candy on top for a festive crunch; in spring swap peppermint extract for orange or raspberry extract for a bright variation. For summer serve chilled with a lemon-mint syrup drizzle for a refreshing take. Around St. Patrick’s Day add a touch of green food coloring to the batter or garnish with green sprinkles to make the mint note feel celebratory. For Thanksgiving, consider adding toasted pecans for a nuttier profile that complements pumpkin-forward menus.
These are ideal for batch prep: bake multiple pans, cool completely, slice, and freeze portions for grab-and-go dessert options. Individually wrap slices in plastic wrap and place in freezer bags; reheating is quick and satisfying—unwrapped and microwaved for 8–12 seconds or warmed in a 300°F oven for 5–7 minutes. Use parchment-lined loaf pans to create brownie loaves for easy slicing and transport. Label with date and any allergen notes for safe sharing.
Nothing beats the simple ritual of cutting into a freshly cooled slab and sharing the first warm square with someone who helped taste-test. These mint brownies are forgiving, adaptable, and consistently well-received—give them a try and adjust the peppermint level to make them your own. Happy baking and even happier sharing!
Use room-temperature eggs to ensure even mixing and a tender texture.
Don’t overmix after adding flour—fold just until combined to keep the brownies fudgy.
Check for doneness at the 22-minute mark—a toothpick should show moist crumbs, not wet batter.
Allow the pan to cool sufficiently before slicing to avoid a runny center.
This nourishing mint brownies recipe is sure to be a staple in your kitchen. Enjoy every moist, high protein slice — it is perfect for breakfast or as a wholesome snack any time.
This Mint Brownies recipe makes perfectly juicy, tender, and flavorful steak every time! Serve with potatoes and a side salad for an unforgettable dinner in under 30 minutes.
Preheat oven to 350°F. Line an 8x8-inch pan with parchment and lightly grease the exposed edges to ensure easy removal.
Whisk melted butter and brown sugar until glossy, then add eggs one at a time and mix until combined. Stir in peppermint extract carefully to taste.
Whisk together flour, cocoa powder, cornstarch, baking powder, and espresso powder (if using) to remove lumps and ensure even distribution.
Fold dry ingredients into wet mixture gently with a spatula until just combined; overmixing will tighten the crumb.
Fold in half the chocolate chips, pour batter into pan, top with remaining chips, and bake 22–28 minutes until edges are set and center has moist crumbs.
Cool in the pan 20–30 minutes, lift out using parchment, and slice into squares. For cleaner cuts cool fully or refrigerate briefly before slicing.
Last Step: Please leave a rating and comment letting us know how you liked this recipe! This helps our business to thrive and continue providing free, high-quality recipes for you.
Leave a comment & rating below or tag
@moodcooks on social media!
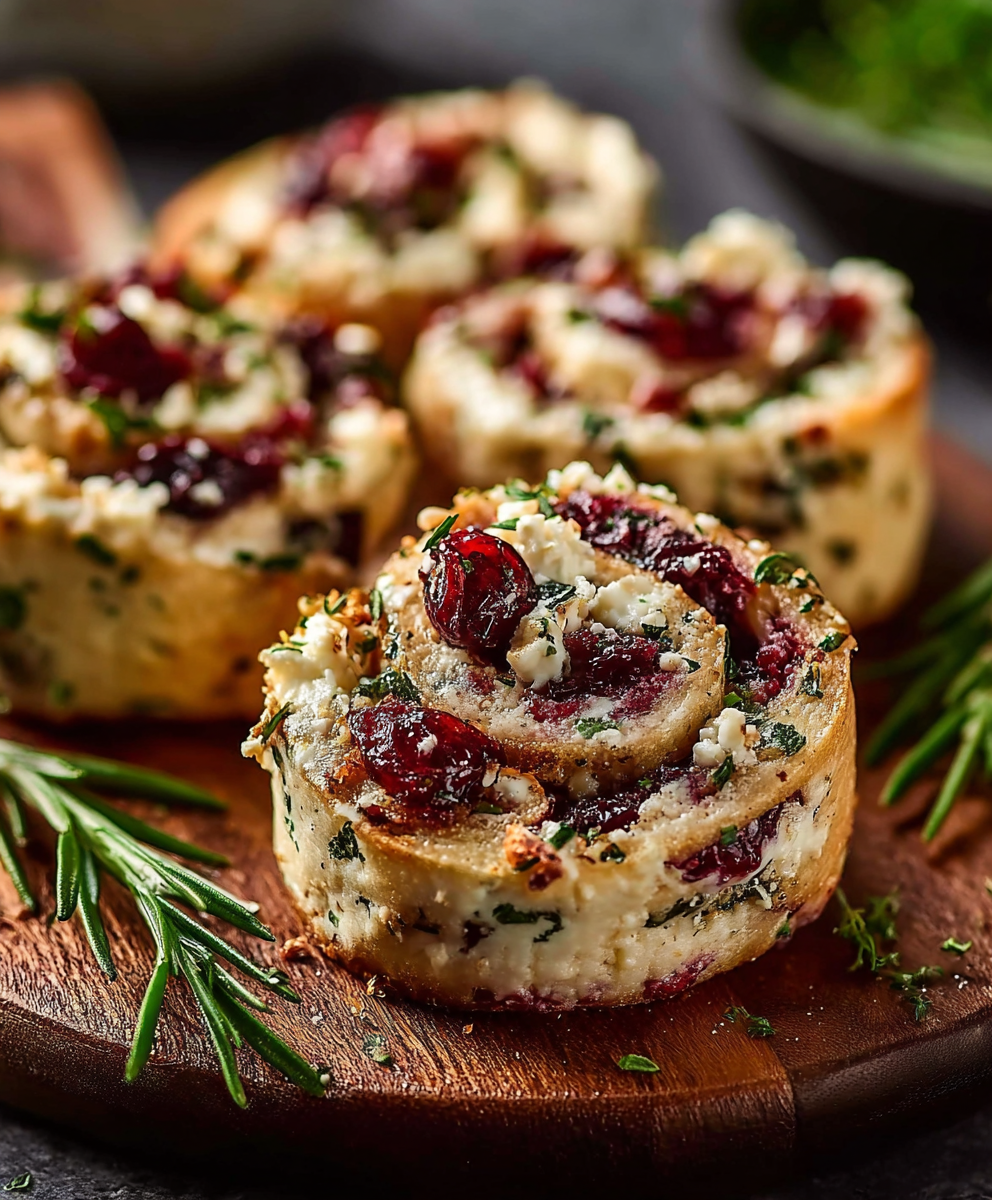
Buttery puff pastry rolled with tangy cream cheese, bright cranberries, salty feta and fresh herbs — effortless, elegant pinwheels perfect for gatherings or a cozy snack.

A simple, reliable dough that produces a crispy exterior, chewy interior and those coveted bubbly pockets — perfect for home ovens or a pizza stone.

Tender chicken breasts wrapped in prosciutto and sage, pan-seared and finished in a bright wine-and-broth sauce — a quick, elegant weeknight favorite.
Leave a comment & rating below or tag @moodcooks on social media!
Enjoyed this recipe? Share it with friends and family, and don't forget to leave a review!
This recipe looks amazing! Can't wait to try it.
Comments are stored locally in your browser. Server comments are displayed alongside your local comments.

Join to receive our email series which contains a round-up of some of our quick and easy family favorite recipes.